Monday, May 9, 2011

Crafting with heart

Feels like simply forever since I updated my blog! With all the long bank holiday weekends and glorious sunshine we’ve been having here, I’ve been spending my free time in the garden, sewing and cooking up new ideas.

Recently listed in the shop are these heart necklaces, I’m really into hearts at the moment and have so far made this necklace in red and turquoise which just so happen to be my favourite colours!

DSCF5607

Thursday, March 24, 2011

Fabric necklaces

I’ve always loved fabric and combining my love of fabric with my love of jewellery. Last year I made a few fabric necklaces for various fairs I attended and they always went down really well with customers.

Look out for a new range of necklaces for Spring/Summer in my shop over the next few weeks.

Here’s a sneak preview:

DSCF4939

A Cath Kidston shabby chic styleee necklace.

You like?

x

Wednesday, March 23, 2011

Custard Cream Cuteness

Since Laura (AKA Lupin @ Bugs and Fishes) blogged about this tin back in October last year, I’ve wanted one.  Although unsurprisingly they had sold out at every Marks and Spencer near us.

This Sunday we were at an Outlet Mall near us and lo and behold there they were. A huge stack of them going for £3 each! I showed mild restraint in only buying two, however I wish I had bought a couple more now as they’d make lovely birthday gifts.

So here it is: My tin, sans biscuits, which have already been eaten by my husband and my dad. Oh well, I’m perfectly happy with an empty tin that I can fill crafty gubbins and works in progress.

DSCF4944

Just yummy.

Tuesday, March 22, 2011

A new work space!

Today is a good day, not only is the sun shining but I’ve finally managed to transfer all of my bits and bobs to my very own craft room/studio. It’s basically just our spare room but I think studio sounds much more professional. I’m over the moon with finally having a space to call my own.

DSCF4937


All of the shelves are now organised and everything is in its place *sigh*


DSCF4936

Now I’ve had a good sort out I’m thinking that I may have to begin a bit of a de-stash sale either in my Etsy shop or maybe even setting up another Etsy shop, depending on how much there is to sell.


DSCF4948


There’s a space for my books and collection of pretty papers/card…..


DSCF4946


All my threads are now colour coded into these boxes from Ikea. I’ve had these for years and years. I WISH they still sold them now! If anyone knows where I could get any I’d be most grateful if you’d let me know.


DSCF4951[1]


Here’s my current view from my desk (although I could sit the other way around and look out of the window too – such small things fill me with so much joy)


DSCF4950

My lovely old sewing machine and a fantabulous poster of a photograph  that my dear Sister in Law took at Whitby and created her own vintage style railway poster.


Happy Days.

x

Wednesday, February 23, 2011

Buttons, glorious buttons

I’ve been loving making these button charm bracelets lately, it’s colour therapy at its best. Picking out combinations of sizes, shapes and hues is one of my favourite makes at the moment.

       DSCF5453

They’ve been listed over at my Etsy shop and I can’t wait to make more. I think my personal favourite is the ‘Little Miss Sunshine’ yellow bracelet (front left) it gets me in the mood for spring time and on a rainy, dull day like today it is much needed.

Love

Ruby x

Monday, February 21, 2011

Look what Nanna knits!

Had a lovely, lovely day today. Started with a visit from my dear Nanna. She brought with her what is possibly the best present I have ever received!

nannas tea cosy

A KNITTED TEA COSY! isn’t it just FABULOUS! (The photo isn’t the greatest as I was in such a rush to share this with you!)

It has elastic around the base to keep its shape,  holes for the spout and handle and a very VERY cute drawstring top. It was knitted from a 1950’s pattern that Nanna found in amongst her pile of patterns. Nanna is currently knitting away to fulfil family requests. I’m trying to encourage her to get them online and share her knitting with the world. It’d only be fair, wouldn’t it.

xx

lovepaperfish.com

Kirsty of Paperfish on Etsy has launched her own online shop. lovepaperfish.com includes lots of her much loved lines such as Pin Pots, Needle books and ooodles of glorious, superb quality buttons.

What I love most about lovepaperfish.com is the ideas and inspiration page. It is filled with ideas on how you can use the supplies available on the site to create your own handmade projects.

image

My favourite project has to be the Log Cabin Cushions

image

Such a fab way of combining all of your fabric remnants.

I ordered my items on Thursday and they arrived by Saturday! Super speedy delivery!

I shall be visiting again very soon and urge you to do the same.

xx

Saturday, December 4, 2010

Oh my!

Today I was lucky enough to have one of my items featured on the front page of Etsy. In a stunning treasury by Brydferth. Since then I've been thrilled and incredibly flattered with the amount of interest in my little bracelet. Having something you have made be liked by others is an amazing feeling.

Here it is!!


To top it off we've been getting all Christmassy today; mulled wine and choosing a simply PERFECT tree from the local nursery (piccies to follow...)

xx

Wednesday, December 1, 2010

Gotta love a snow day!


I am lucky enough to have had the day off today due to the snow. I thought it would be nice to don my wellies and go for a little stroll this morning. So here I was, feet in, ready to go:


Lovely eh? You'd think so wouldn't you. That was until all the snow slid from the roof of our house derectly on to me. I felt like I was in a scene from Vertical Limit or something (without the worry of impending death of course)
So to cut a long, and soggy, story short; I organised some of my fabric stash into a pretty little basket insead.


And I can tell you it was a thoroughly more entertaining task than waddling about in the snow :D
I loved folding all the fabric nearly and rowing it up in the basket, small, happy things.


I've also had time to list a few bits and bobs in my Etsy shop. I've been meaning to do it for ages so I'm pretty happy with my productive morning.

Here are a couple of fabric rings I've been working on, it's taken me a little while to perfect the design but I'm happy with how they've turned out; there a peachy/mustard polka dot one:


another shot...


And a rather nautical blue and white striped one;


again...


Both can be found here in my shop.

Where you'll also find a new wood effect BIG button brooch:


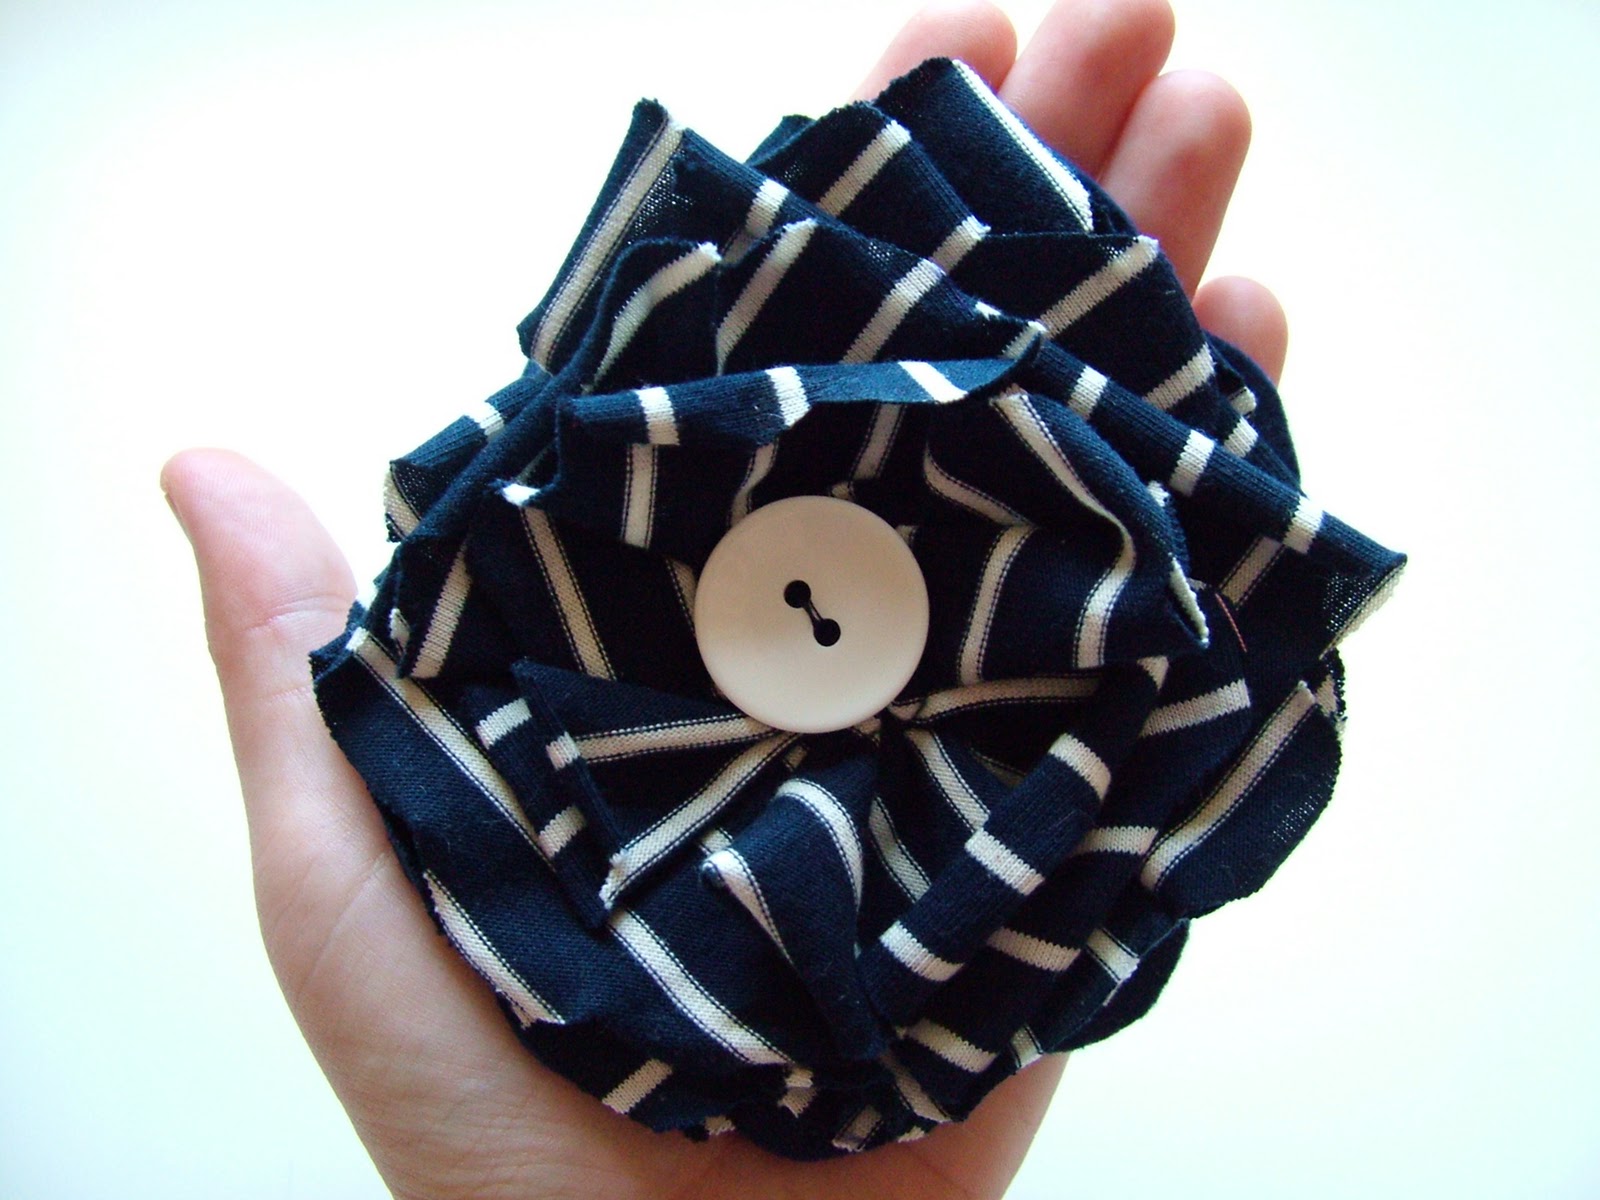
And another nautical treasure; this layered fabric flower:


Right folks, thats all for now. Off for a cuppa. xx

Tuesday, November 30, 2010

Finished baubles and a fun tutorial

After my bauble tutorial I went on to make lots of the little lovelies. I adore them (it's ok to say you adore your own work right?) and I am tempted to save a couple for my own tree.


 They've now taken their place in my ornaments basket ready for the next fair!


Being a 'maker', especially at Christmas, I never seem to get around to my own crafts, just for me and my house. I've got so many ideas for home decorations but the closest I've got to realising any of those ideas this week was beginning to paint our dining chairs with my lovely man. Here's how they're looking so far;


I LOVE the colour against the colour of my ruby red dresser, I'm a firm believer in colour as therapy and this is all the therapy I need; one pretty turquoise chair. I'll get around to painting the rest later.


My blog title also promised a fun tutorial. This time it's not one of mine but a cute, quick make by Lupin over at her much loved blog Bugs and Fishes. Such a simple idea but so effective! I just had to have a go!


Must dash, got a huge WIP box to attend to, and I simply must find time to play in the snow. xx

Tuesday, November 23, 2010

Button bauble tutorial

Long time away from the blog and one wedding later, I'm back and feeling very Christmassy all of a sudden. Thought I'd share this cute button bauble tutorial.


You will need:
Felt - any colour of your choice
Ribbon - small scraps that need to be used up are perfect for this make
Buttons - various shapes and sizes


1. Begin by cuttng 2 felt circles in a colour of your choice, I simply used a glass to draw around.

2. Choosing the buttons is by far my favourite part of this make. I opted to go for non-traditional Christmas colours for this bauble


3. Stitch your buttons onto your top circle only. You can either leave a space between your buttons or overlap them as I have done. I personally prefer to overlap the buttons for a 'bursting with buttons' effect.


Keep overlapping the buttons....


Until you have a completed buttoned circle


4. When you have stitched your buttons on, choose a piece of ribbon to make a loop with and sew it onto the back of the buttoned front circle.  ETA: I would usually do this first before attatching my buttons but it's ok to do it afterwards too, I was just giddy to get started!


5. Now place the back circle of felt in place and use a pin to secure to the front. Use either a whip stitch or a blanket stitch.


Leave about an inch before you complete the circle, remove the pin and stuff with wadding/stuffing/felt scraps/old shredded tights (washed of course)


6. Finish off your stitching, et voila! A beautiful button bauble.


Variations
  • Add matching/contrasting ribbon to the back of your bauble.
  • Create different shapes such as Christmas trees or even bells.
  • Use ribbons and buttons combined on the front of the bauble.
The possibilties are endless and I hope you enjoy this making these pretty baubles.

Merry Christmas, everyone!

Thursday, June 3, 2010

Heading for a wedding

Okay, so I get married in 3 months and I was expecting planning a wedding to be an exciting job, it really isn't. The amount of things to do is mind boggling and we're only having 50 guests! Early on I decided on the style of dress I'm having and found someone locally to make it for me. I also decided on my bridesmaids dresses too and they set the tone for the day:


They're going to have tiered cotton underskirts to really make the most of the circle skirt. But my main niggle now is what colour suits the men could have? Any ideas welcome :) x

Wednesday, June 2, 2010

Front page excitement and other news


Look! My Canary fabric necklace made the front page of Etsy last week. I was incredibly excited and proud, not only that Brydferth over on Etsy had added my necklace to her gorgeous Treasury but that it had made it to the front page and recieved over 1000 views. Now to many establised Etsians it may be 'par for the course' to have lots of views and feature on the front page but for me, in my humble infancy, it was amazing!

In other news, more fabric necklaces and button jewellery will be added to my shop soon and I'll be sure to return and post some preview pics this evening. For now though, I shall celebrate my moment of front page fame with a cup of tea and a banana muffin (homemade, of course!)

x

Thursday, May 20, 2010

A love affair

So, I love buttons, as I'm sure you already know. I found myself looking through my jars (well boxes :S) of buttons today when I came across some lovely little charms I'd forgotten all about!
I new I simply had to use them, and seeing as though they'd obviously spent a long time making friends with my button collection I decided to make them a permanent home together on a bracelet. Here's the result:


I'm rather pleased with how it turned out, it's now listed here on in my shop. Waiting to be sent to a new home :)

*ETA - should I worry that I am personifying my buttons?*

Thursday, April 15, 2010

Inspiration

Lately I have been looking for a way to incorporate my love of textiles with my love of jewellery. I began experimenting with some designs for fabric and felt necklaces but I wasn't too happy with the results. Something was missing... Then I came across Fabric Rehab


What have I been missing out on all this time?! The fabric is beautiful and there's such a wide selection. I suddenly found myself filled with inspiration for my necklaces. I bought fabric with owls, lovebirds, quirky 50's patterns and of course polka dots. Here's how it's going so far..


Some other shapes i've been experimenting with:


I'm going to add chain and a pretty clasp to the fabric pieces today. More photos to follow.

Happy crafting days. I love them.

Wednesday, April 7, 2010

How to make bunting!


Having had a rather busy time lately what with wedding planning, work and DIY (eek) I've not found the time to do this tutorial...until now! So here goes, this is how I make my bunting. I don't profess to be a sewing expert or anything but I've found this method works for me.

You will need:

Fabric - any old fabric will do but the thicker cotton duck fabrics (usually used for curtains/cushions) are easier to work with if you're a sewing virgin!
Sewing cotton and embroidery thread - in colours of your choice, I've just used white.
Scissors
Greaseproof paper
Headed pins

Sewing needle
Bias binding - again in a colour of your choice
Sewing machine - although you can hand sew but it may take you a while!
Two large buttons
Iron
Felt - optional

If, like me, you're making bunting for a special occasion like a wedding, birthday or christening then you might like to personalise the bunting using appliqued felt letters. Applique basically means sewing an embellishment (in this case lettering) onto another fabric.


I've included the 'happy birthday' print templates at the end of the tutorial as well as a template for the pennants - posh name for bunting flags don't you know ;)

This tutorial will go through the steps to make Happy Birthday bunting so if you just want plain bunting miss out steps 2-4

Step 1
Choose your fabrics. You might like to pick a colour scheme or do what I did and go for a rainbow of colour.

Transfer the paper pattern to greaseproof paper and pin to the fabric.


Carefully cut around the edge. You'll need to do this twice for each flag.


I made 17 flags - 13 for the 'Happy Birthday' and 2 for either side.


Step 2
Print out the letters you need onto paper or card and cut them out.


Draw around the template onto the felt using a tailors pencil, vanishing pen or just an ordinary pen as it'll be hidden when you sew it down. Reverse the letters so they're the right way round when you turn them over (if that makes sense!)


Then cut them out.


Step 3
Lay the flags out and decide on the order you would like them to be positioned. Lay the felt letters on top of the flags to check that you like the colours and layout.


Step 4
Pin the letter to the front of one of the two flags and use a whip stitch to attach it to the flag. Repeat for all flags with lettering.


I decided to use a thick embroidery thread so it would show for a fun effect but you could use a thin cotton in a matching or contrasting colour for different effects.


Step 5
Now pin the two flags together with the 'right' sides facing inwards.


Repeat for all of the flags


Then stitch 5mm from the edge along the two diagonals creating a fabric cone. The top will be sewn up later.
I used a tight running stitch setting on my sewing machine. What ever stitch you choose to use it needs to be a straight, tight stitch so it is secure and can be turned inside out easily without losing too much flag.
Repeat for all of your flags.


Step 6
Turn your flags the right way around and use a pen or the end of your scissors to ease out the point of the flag. Iron the flags flat and take a moment to appreciate how pleasing a little stack of ironed flags is! NOTE: Always iron felt applique flags on the reverse of the flag.


Step 7
Lay your flags out again and decide how far apart you would like them to be, if at all. Then measure how much bias binding you will need, I used about 2.5m. You will need to allow for at least 10cm of binding free at each and to create a loop for hanging.


I like to use bias binding as it has a neat finish but you could use ribbon. If you're not very confident when sewing it is better to use a wider ribbon or bias to allow room for error when sewing the flags on.
Iron the bias in half to make positioning easier then pin your flags in place, tucking the tops of the flags into the fold.


Step 8
Use a wide zig-zag stitch to run along the bias to secure the flags in place. You could use a coloured thread for extra cuteness!


Step 9
Create a loop using the ends of the bias and sew in place, use a cute matching button to hide the end of the loop.


Step 10
Let your bunting take pride of place either for a special event or as a gorgeous shabby chic decoration all year round.


PS: If you use my tutorial to make bunting I'd love to see a picture of what you've made!

TEMPLATES


Related Posts Plugin for WordPress, Blogger...